Jims Radios
- Home
- Eliot The Robot
- Rotary Dial Telephone Demonstrator
- You've Got Snail Mail !
- 1921 Westinghouse "Aeriola Senior."
- 1924 Atwater Kent 10A "Breadbox"
- 1925 Music Master "Type 60"
- 1928 Crosley 608 "Gembox"
- 1931 Crosley 124 "Playtime"
- 1932 Philco Model 112
- 1932(?) Voco V41N
- 1933 Stewart Warner R115 "Companion"
- 1934 Grunow 902
- 1935 Atwater Kent 944
- 1936 Crosley 515 "Fiver"
- 1937(?) Goodyear "Wings"
- 1938 Grunow 585 "Arm-Chair"
- 1938 Howard 400
- 1939 Philco 39-71 "Traveler"
- 1939 Silvertone 6256B
- 1939(?) Radio Lamp Co. "Radio-Sight"
- 1940 Philco 40-185
- 1946 Motorola 65x11A
- 1947 RCA Victor 65X1
- 1947 Stewart Warner 9000B
- Radio Premiums and More
Purpose:
To have fun and show my grandson what can be accomplished with learning and a little effort.
What it Does:
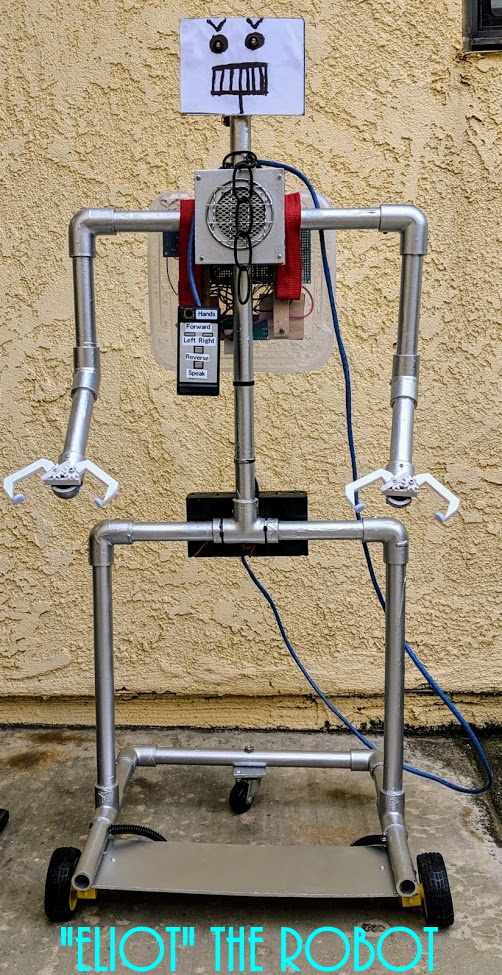
Using the remote control, it moves forward & backwards, right & left.
It blinks its eyes, talks & can grasp and holds objects with its "hands".
Background:
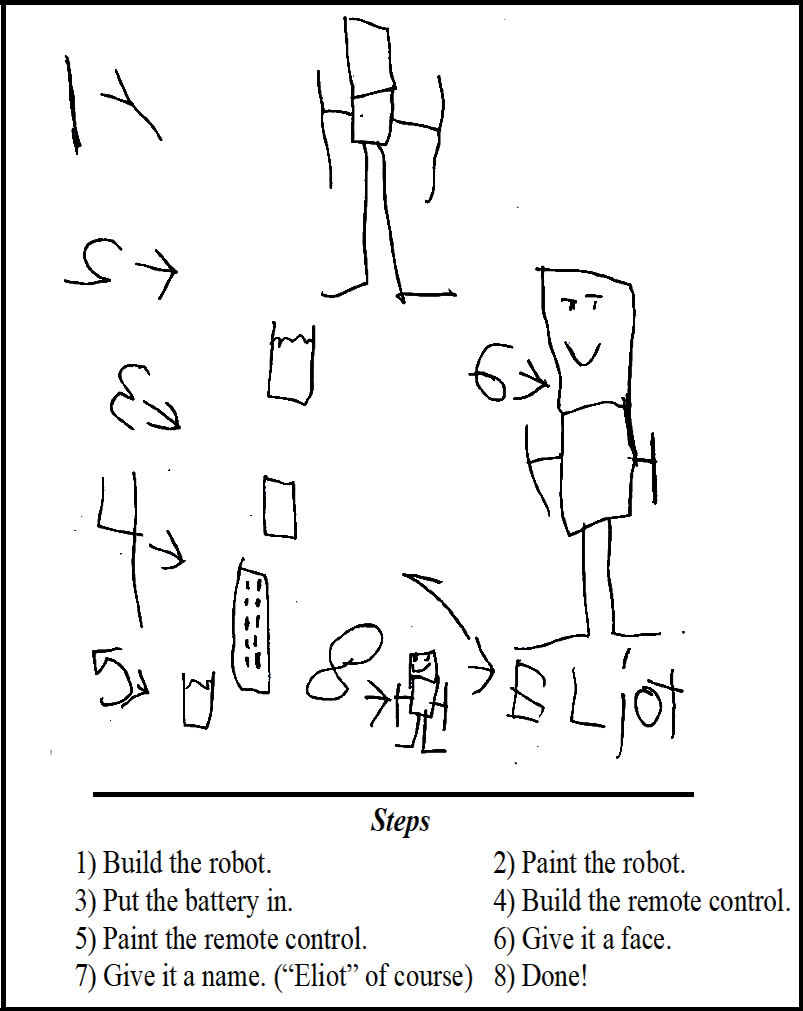
The robot was my 5 year old grandson Eliot's idea; “We should build a robot”.
When I told him that I thought might be too difficult, he said that we just needed directions, so he sat down and made a set of directions showing, in his 5 year old mind, how to build a robot. (See Below). The ball was now in my court - how could I not follow through?
Project Challenges:
According to Eliot it had to walk and talk.
Eliot's directions included painting, adding a battery, building (and painting) a remote control and giving it a name. Can you guess what Eliot named it?
What We Did:
How It Works:
To have fun and show my grandson what can be accomplished with learning and a little effort.
What it Does:
Using the remote control, it moves forward & backwards, right & left.
It blinks its eyes, talks & can grasp and holds objects with its "hands".
Background:
The robot was my 5 year old grandson Eliot's idea; “We should build a robot”.
When I told him that I thought might be too difficult, he said that we just needed directions, so he sat down and made a set of directions showing, in his 5 year old mind, how to build a robot. (See Below). The ball was now in my court - how could I not follow through?
Project Challenges:
According to Eliot it had to walk and talk.
Eliot's directions included painting, adding a battery, building (and painting) a remote control and giving it a name. Can you guess what Eliot named it?
What We Did:
- Eliot and I built the frame out of PVC pipe and painted it.
- Eliot drew the face.
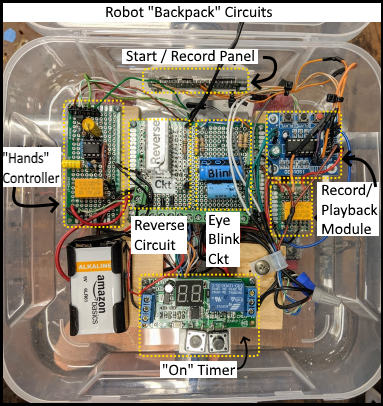
- Blinking eyes for a touch of robot realism.
- Two motors which can be operated individually for turning, or together to go straight.
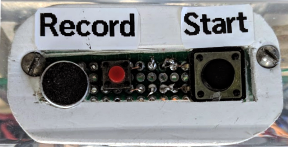
- A record/playback module supplies the voice.
- Power is from 4 "D" cells and 1 9v battery.
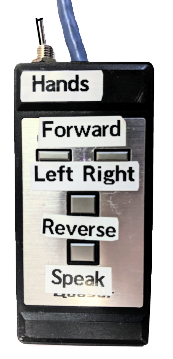
- I re-purposed an old VCR wired remote control that I found in my Dad's junk box.
How It Works:
- Pressing "Start" causes the eyes to start blinking and provides power to the other circuits. Automatic timeout after 15 minutes to conserve the batteries.
- The “Right” button causes the left motor to operate, turning the robot to the right.
- The “Left” button causes the right motor to operate, turning the robot to the left.
- Press “Left” & “Right” buttons together for straight ahead operation.
- The “Reverse” button activates a reversing relay powering both motors with reverse polarity.
- A "Hands" toggle switch on the remote opens and closes the "hands".
- Pressing the “Speak” button causes the record/playback module to play the recorded message.
- Press and hold the "Record" button on the "Start/Record" panel to record a new message.
